
Max has been a collector for as long as I can remember. Sticks, rocks, shells, pine cones, you name it, we probably have a collection of it somewhere. I'm pretty sure he inherited this passion from his dad. One look in his workshop and you'll understand what I mean.
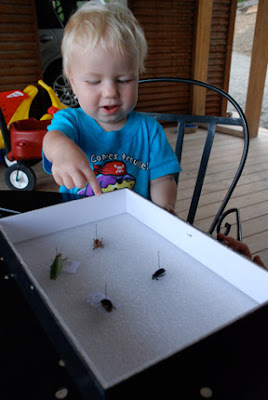
Most recently, Max's collection is of the six-legged variety. It began with a designated spot in the garage where he placed an expired beetle, cricket, and stick insect all in a neat little row. As the bugs began to accumulate, however, I decided to take action. It was time to display these little specimens properly. We headed out to the nearest nature store in Asheville and stocked up on some basic entomology supplies. Max has been a busy bee (pun intended) ever since.
PINNING

The best way to display insects is to pin them in a display box using insect pins. Pinning actually takes some practice to do it right. There are some basic rules to follow (which I am not concerning Max with at this point in his career).

It's important to use pins specifically designed for insect pinning because they are treated to resist rusting. The pins vary in size. We chose number 4 pins as they are not too flimsy for little fingers and they work well for the amateur collector.
LABELING SPECIMENS
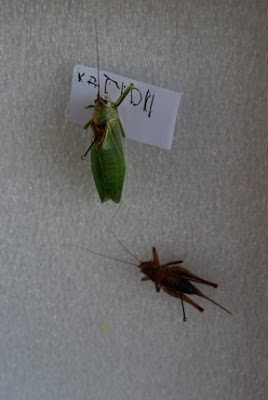
This is a great learning opportunity for the kiddos! We use the Golden Guide for Insects to look up the insect names. Pin labels (made from card stock paper) underneath the specimen. Information can include the insect's common name, scientific name, date found and locality.

Max labels his katydid ...

Wyatt gets involved ...


A Great Beginning

I Love it!!!!
ReplyDeleteI'm in Asheville next week... hope to see the whole Brown Trout family.
David
So frickin' cute!
ReplyDeleteHi David! We would love to see you! Safe travels ...
ReplyDelete